How to Set Up a Hammock Bug Net Correctly: A Step‑by‑Step Guide for 360° Protection2026-05-07
There is nothing quite like drifting off in a hammock under a canopy of trees, with the scent of pine in the air and the soft rustle of leaves overhead. That idyllic scene, however, can be shattered in seconds by the high‑pitched whine of a mosquito or the invisible bite of a no‑see‑um. For outdoor enthusiasts who want uninterrupted sleep in buggy environments, a properly set‑up hammock bug net is not a luxury—it is essential to staying safe from insect‑borne diseases, avoiding sleepless nights of swatting, and preserving the pristine enjoyment of nature.
The key challenge for many newcomers is that a bug net is only as effective as its setup. An improperly installed net can leave gaps for insects to enter, may sag onto your face, or can even be torn during entry and exit. This guide walks you through two of the most popular designs—bottom‑entry (zipper‑free) nets and ridgeline‑style nets—and explains how to achieve complete, 360° protection every time.
Choosing the Right Bug Net Material
Before setting anything up, it helps to understand what you are working with. The most common material for hammock bug nets is no‑see‑um mesh, a finely woven fabric that blocks even the tiniest biting insects. The name “no‑see‑um” refers to the fact that these tiny flies are almost invisible, and the mesh’s small hole size stops them cold. Manufacturers also use polyester mesh and nylon mesh, each with its own trade‑off: nylon has more stretch and drapes better around a hammock, while polyester mesh is less elastic but often lighter and more dimensionally stable. For maximum breathability on warm nights, look for netting rated around 900–1000 holes per square inch, which provides excellent airflow while still keeping insects out.
How a Bottom‑Entry Bug Net Works
The bottom‑entry design, often called a “Fronkey‑style net” after the DIY hammocker who popularised it, eliminates zippers entirely. Instead of a side opening, the net has a large elasticised opening on the underside, which is cinched shut with shock cord and a cord lock after you are inside. This approach avoids zipper snags and failures, which are common failure points on outdoor gear, and makes entry and exit remarkably fast.
Most bottom‑entry nets are sized to fit hammocks up to 11 feet (about 3.3 m) long. A typical example is the Hammock Gear Bottom Entry Bug Net, which measures 120 inches (10 ft) in length and 50 inches wide, packs down to roughly 9 × 5 inches, and weighs only about 6.5 ounces (184 g). It uses an elasticised shock‑cord opening at the bottom and clips directly to the hammock’s suspension at both ends.
Step‑by‑Step Setup: Bottom‑Entry (Zipper‑Free) Bug Net
Before starting, make sure your hammock itself is properly pitched. The distance between the two trees should be roughly 3 to 4 metres (10 to 13 feet). For the hammock to hang with the correct sag (typically a 30° angle at the suspension), use a ridgeline. Your ridgeline should be about 83 % of your hammock’s length—for an 11‑foot hammock, that is roughly 109.5 inches(约9.13 ft). This ridgeline keeps the hammock at a consistent sag and also serves as the anchor that holds the bug net above your body.
Attach the hammock as usual. Wrap your tree straps around two sturdy trees (minimum 6 inches in diameter), attach the carabiners, and adjust the tension until the hammock’s ridgeline is taut but not guitar‑string tight.
Clip the bug net to the suspension. Most bottom‑entry nets come with mitten hooks or small carabiners at each end. Clip these hooks around the hammock’s suspension lines, just outside the gathered ends of the hammock. On the Amok DRAUMR, for instance, you attach a small carabiner to the ridgeline before using the zipper, then use two internal cord adjusters to lift the net away from your face.
Let the net drape over the ridgeline. The ridgeline runs along the top of the hammock. The bug net should rest on top of that ridgeline, not directly on your body. If your net has a separate ridgeline of its own (like the Guardian Bug Net), string that line between the trees first, then hook the net onto it, before feeding the hammock ends through the net from the inside.
Check the fit. The net should be loose enough to move with you but not so baggy that it sags onto your face. For DIY nets, the rule of thumb is to measure your ridgeline, multiply by 2, and add 6 inches to allow for some wiggle room. A tight net can tear when you shift position during the night; a little extra slack prevents damage.
Enter through the bottom. Reach under the hammock, find the elasticised opening, and pull it outward and to the side. Stick your head and torso through the opening, turn around, sit in the hammock, and then pull your legs in. Once you are settled, cinch the shock‑cord closed tightly with the cord lock to seal the opening.
Final checks. Make sure the opening is fully sealed beneath you. Some users also like to tie a simple overhand knot on the ridgeline at both ends of the bug net to prevent the net from slipping along the suspension. And crucially, never sit on top of the bug net while entering—the mesh can tear under direct weight.
To exit, repeat the process. Find the opening beneath you, pull it to the side, put your feet through, and hop out. You do not need to loosen the shock cord first; the elastic gives enough room. Just remember to close the opening again once you are out, so no bugs sneak in while you are away.
Step‑by‑Step Setup: Ridgeline‑Style Zippered Bug Net
Some hikers prefer a zippered net for the convenience of a full‑length side opening. These nets usually attach to a dedicated ridgeline and are particularly well‑suited for campers who use an under‑quilt and want easier access to gear stored beneath the hammock.
Hang your hammock following the same principles as above, including a structural ridgeline.
String the bug‑net ridgeline. Most zippered nets come with a 3 mm cord that you tie between the same two trees, above the hammock. The line should be taut and run directly over the centre of the hammock.
Clip or drape the net over the ridgeline. Many nets have small loops or clips that attach to this line. Others simply rest on top, with the ridge line running through a channel sewn into the top of the net.
Feed the hammock ends through the net. Pass the gathered ends of the hammock through the openings at each end of the net, then attach the hammock’s suspension to the tree straps as usual. The net should now completely surround the hammock.
Adjust for clearance. Use the internal pull‑outs or adjustable cords to lift the net away from your face and shoulders. On the Amok DRAUMR, an elastic guyline in the head end can be attached to a nearby object to keep the net off your face when lying down.
Zip up and relax. Ensure the full‑length zipper runs smoothly and is completely closed. Many modern nets have a double‑sided zipper so you can open the net from either side, which is handy when you want to reach for a water bottle or book without letting a swarm of insects inside.
Avoiding Common Setup Mistakes
Skipping the ridgeline. A ridgeline is not optional for a bottom‑entry bug net. Without it, the net will collapse onto your face, making sleep uncomfortable and reducing the effective air circulation. The ridgeline also helps maintain the ideal 30° hammock angle, which keeps the fabric from wrapping around you.
Over‑tightening the net. A bug net that is drum‑tight is a bug net that will tear. Whether you are sewing your own or using a commercial model, always add a few inches of slack to account for movement.
Forgetting to seal the bottom. On bottom‑entry nets, the shock cord opening is only effective if you cinch it firmly after getting in. A loose opening is an invitation for mosquitoes.
Not matching the net size to your hammock. A net that is too short will leave gaps at the ends; one that is too long will be baggy and hard to manage. Most universal nets are designed for hammocks up to 11 ft long. For example, the Sierra Madre Research Serac DartFrog Bug Net is 10 ft long and fits almost any hammock, while the Hammock Gear net is explicitly sized for 11‑foot hammocks.
Ventilation and Comfort
One concern with any bug net is airflow, especially during hot, humid nights. High‑quality no‑see‑um mesh is designed to allow plenty of air movement while still blocking insects. The Guardian Bug Net, for instance, uses “super‑fine no‑see‑um netting” that lets air and sunlight through while keeping pestering insects away. In warmer weather, you can leave your rainfly partially open or skip it entirely, using only the bug net for ceiling‑level ventilation.
If you still find the net feels stuffy, consider switching to a net with a larger mesh size (coarser weave) for better airflow, but be aware that very large mesh may not block no‑see‑ums. An effective compromise is to treat the net with permethrin, which repels insects and allows you to use a slightly more breathable mesh.
DIY Considerations
For the hands‑on camper, sewing your own bug net is a rewarding project. The basic Fronkey‑style design requires about 7 yards of no‑see‑um fabric, 5 yards of 1/8‑inch shock cord, one cord lock, and black 100 % polyester thread. To calculate the fabric length, measure your ridgeline, multiply by 2, and add 6 inches. For example, a 110‑inch ridgeline yields a fabric length of 226 inches, which you then fold in half to produce a 113‑inch piece that hangs over the ridgeline. The bottom opening is sized to about 20 % of your ridgeline length—22 inches for the same 110‑inch example—which gives enough room to enter but still seals securely when cinched.
Field‑Testing Your Setup
Before heading into the backcountry, always test your bug net at home or in a nearby park. Lie in the hammock, shift your weight from side to side, and check for any gaps around the gathered ends or along the bottom opening. Make sure the shock cord holds its tension and that you can enter and exit without snagging the mesh. A small hole that is not noticed at home can become a major mosquito highway once you are miles from a repair kit.
A hammock bug net transforms a potentially miserable night of buzzing insects into a peaceful, restful sleep under the stars. The two most effective designs—the bottom‑entry (zipper‑free) net and the ridgeline‑style zippered net—both achieve 360° protection when installed correctly. The bottom‑entry design excels in simplicity and reliability, with no zippers to jam or fail. The ridgeline net offers easier access for those who like to keep small items inside the hammock. Whichever style you choose, remember the golden rules: use a ridgeline, give the net some slack, seal the opening completely, and always test your setup before sleeping in mosquito territory. With these steps, you will enjoy the best of both worlds: the open‑air freedom of hammock camping and the security of a bug‑free cocoon.
By learning how to set up a hammock bug net correctly, you are not just assembling gear—you are ensuring that your next outdoor adventure is defined by the beauty of the wilderness rather than the whine of mosquitoes. Once you have experienced a night with 360° protection, you will wonder how you ever camped without it.
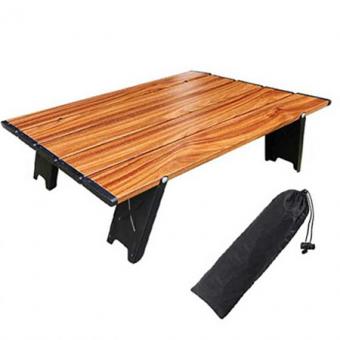
Brand: ANHUI FEISTEL FACTORY Relate Manufacturing: OEM & ODM Product: A lightweight, small, foldable picnic table perfect for outdoor activities. Made of durable materials, it's portable, easy to set up.
Brand: ANHUI FEISTEL FACTORY Relate Manufacturing: OEM & ODM Product: The custom lightweight metal iron foldable moon chair offers durable support and comfort, ideal for outdoor camping, with a compact, portable design for easy transport and storage.
Brand: ANHUI FEISTEL FACTORY Relate Manufacturing: OEM & ODM Product: The hiking backpacking mini stool combines a durable Oxford fabric foldable design with a creative pencil case pocket, offering portability, comfort, and practicality for camping and outdoor adventures.
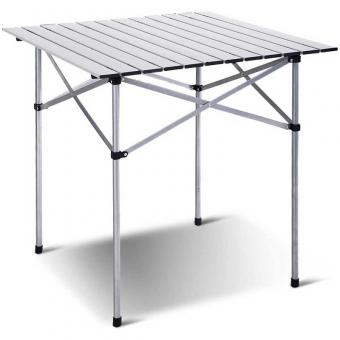
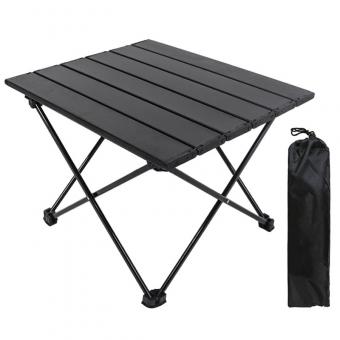
Brand: ANHUI FEISTEL FACTORY Relate Manufacturing: OEM & ODM Product: Compact and lightweight aluminum folding table, perfect for camping, beach, or outdoor activities. Easy to carry, sturdy, and ideal for holding food and drinks.
Brand: ANHUI FEISTEL FACTORY Relate Manufacturing: OEM & ODM Product: This camping foldable wooden lounge chair features a sturdy frame, ergonomic reclining design, and compact folding structure—perfect for relaxing at the beach, campsite, or backyard.
Brand: ANHUI FEISTEL FACTORY Relate Manufacturing: OEM & ODM Product: An outdoor ultralight single compact portable folding camping bed ideal for backpacking, featuring a durable frame, easy setup, and a convenient carry bag for travel.
Newsletter
Subscribe to our newsletter to receive news, updates, and special offers by email.